So, you’ve decided to explore the world of waist training. Whether you’re seeking a smoother silhouette for a special occasion, posture support, or an extra boost during workouts, understanding how to properly use a waist trainer is the single most important factor for your safety, comfort, and results. A waist trainer isn’t just another piece of clothing; it’s a tool that requires knowledge and technique. Using it incorrectly can lead to discomfort or even harm, while proper use can deliver the temporary shaping and support you desire. This comprehensive guide will walk you through every critical step—from choosing your size to troubleshooting fit issues—ensuring your experience is both effective and safe.
The Foundational First Step: Getting Your Size Right
Before you even think about lacing up, you must solve the essential sizing puzzle. This is where most beginners go wrong, leading to a frustrating and painful experience.
When Buying a Waist Trainer, Do You Size Up or Down?
This is the most common question, and the answer is crucial: You size down, but with intelligent, measured moderation. Sizing up defeats the purpose of the garment, while sizing down too aggressively is dangerous. The goal is to select a waist trainer with a closed measurement (its size when fully fastened) that is smaller than your natural waist.
Here’s the safe, standard process:
- Measure Your Natural Waist Accurately: Using a soft tape measure, find the smallest part of your torso, typically above your navel and below your rib cage. Don’t suck in; breathe normally and measure snugly.
- Apply the Reduction Rule: For a beginner, a reduction of 3-4 inches is a safe and effective starting point. For example, if your natural waist is 30 inches, you might look for a waist trainer that closes at 26 or 27 inches. More experienced users may aim for 5-7 inches with steel-boned garments. Latex trainers typically offer less reduction (2-4 inches).
- Understand the Risk: Choosing a size too small can cause pain, difficulty breathing, nerve compression, and digestive issues. As noted by the Cleveland Clinic, constant excessive pressure carries health risks. A size too large will simply not provide the intended support or shaping and may roll or bunch.
Always consult the specific brand’s sizing chart, as sizing can vary. Reputable retailers like Orchard Corset provide detailed guides emphasizing this “closed measurement” principle.
Achieving the Perfect Fit and Recognizing Real Progress
Once you have the right size, the next step is learning how to wear it correctly and manage your expectations. Knowing what a good fit feels like is key to a positive experience.
How to Put On Your Waist Trainer Properly
Don’t just yank it tight. For hook-and-eye closures, start with the middle hook. For lace-ups, never pull the laces straight across; instead, loosen them fully, fasten the front busk (if applicable), then tighten from the top and bottom toward the middle—like a shoe. This creates a comfortable, anatomical fit.
How Do You Know a Waist Trainer is Working?
It’s vital to define “working” correctly. A waist trainer’s primary functions are temporary silhouette shaping and posture support. It is not a device for permanent fat loss.
- Signs of Effective, Safe Use:
- Immediate Silhouette Change: A visible smoothing and curving of your waistline under clothing.
- Improved Posture: The rigid back panels naturally encourage you to sit and stand straighter.
- Comfortable Support: A feeling of firm, even compression around your core and lower back.
- Manageable Tightness: You should be able to take a full breath, sit down comfortably, and eat a small meal without significant distress.
- Unrealistic Expectations to Avoid:
- Permanent Reduction: Any slimming effect vanishes once the garment is removed.
- Fat Loss: It does not “melt” fat. Any “sweating off inches” is temporary water weight.
As highlighted in research from Surgery for Obesity and Related Diseases, managing expectations is critical, as these garments alter body image temporarily but do not cause long-term fat reduction. Real progress is measured in consistent, comfortable wear time—a process known as [INTERNAL LINK to article on ‘Seasoning a Corset’]”seasoning” for steel-boned styles.
Troubleshooting Common Fit Problems
Even with the right size, minor issues can arise. Listening to your body is non-negotiable. Pain is a warning sign, not a rite of passage.
What Are Signs of an Ill-Fitting Waist Trainer?
- Sharp Pain, Numbness, or Tingling: This signals nerve compression or excessive pressure. Loosen it immediately.
- Digging into Ribs or Hips: Often means the garment is the wrong length or “spring” (curvature) for your torso.
- Difficulty Breathing or Severe Digestive Discomfort: The reduction is too aggressive, or it’s worn too tightly after a meal.
- Severe, Lasting Red Marks: Light pink marks that fade within 30-60 minutes are normal. Deep, painful, or purple marks are not.
- Constant Rolling at the Top or Bottom: Usually a mismatch between the garment’s shape and your body’s.
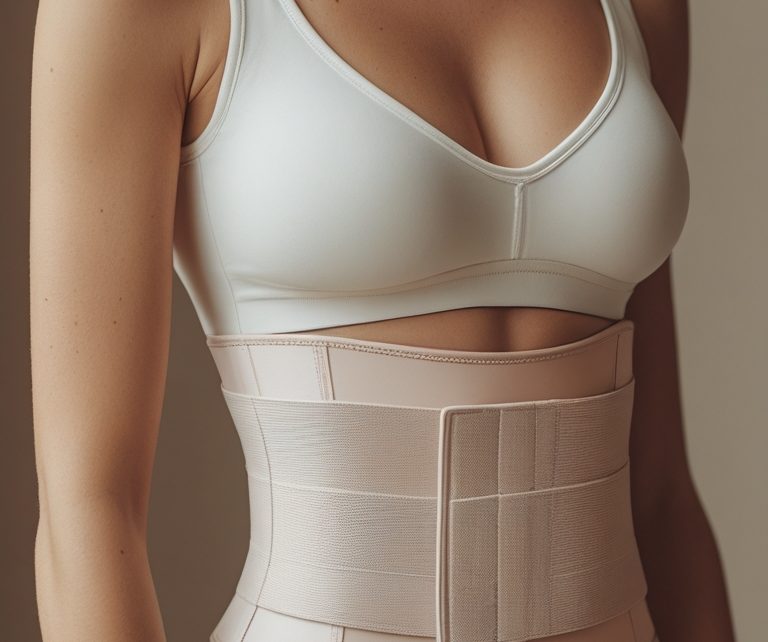
How to Get Rid of Back Bulge from Waist Trainer
Often called “back muffin top,” this bulge where the waist trainer ends is a common frustration. It’s usually a fit issue, not a body issue.
- Check the Length: The #1 cause is a waist trainer that is too short. It needs to be long enough to fully cover your torso from just below the bust to over the hip bones to properly redistribute tissue.
- Choose the Right Style: Avoid very short “waspie” styles if you’re prone to bulging. Opt for a standard or long-line style for better control.
- Follow the Seasoning Process: Tighten your waist trainer gradually over weeks. This allows your body’s soft tissue to gently redistribute over time instead of being forced into bulges.
- Use a Smoothing Layer: Wear a seamless shaping camisole or a dedicated corset liner over the waist trainer. This acts as a buffer and smooths any minor bulging under your clothes.
For a deep dive on fit anatomy, resources like Lucy’s Corsetry offer excellent visual guides on solving these specific problems.
Practical Daily Wearing Guidelines and Styling Tips
Integrating a waist trainer into your daily routine requires knowing the practical dos and don’ts for hygiene, comfort, and style.
Do You Wear a Bra with a Waist Trainer?
Yes, in almost all cases. The standard, most effective order of wear is:
Underwear → Bra → Waist Trainer → Other Clothing.
- Why Bra First? Putting your bra on first ensures the band sits directly against your skin for optimal support. The waist trainer then goes over it, which can help smooth the back of the bra band.
- Best Bra Styles: For underbust waist trainers, a strapless or convertible bra is ideal. With longline styles that cover the bust, any comfortable bra works, though seamless cups prevent visible lines.
Essential Daily Wear Rules
- Always Use a Barrier: Wear a thin camisole, tank top, or specialized liner between your skin and the waist trainer. This protects the garment from sweat and oils and prevents skin irritation.
- Respect the Break-In Period: Start by wearing your waist trainer loosely for just 1-2 hours a day. Gradually increase wear time and tightness over 2-3 weeks. Never start with 8-hour days.
- Know When to Take It Off: Remove your waist trainer before sleeping, during high-impact exercise (unless it’s a specific workout-grade latex style), or if you feel any pain, dizziness, nausea, or shortness of breath.
- Styling It Seamlessly: Waist trainers work beautifully under fit-and-flare dresses, high-waisted pants, and structured tops. Avoid pairing them with very tight, thin knits that may show lines.
For more on daily integration, guides from retailers like Corset Story offer practical styling advice.
Conclusion: Your Blueprint for Safe and Effective Waist Training
Mastering how to properly use a waist trainer comes down to a blend of precise sizing, patient practice, and mindful awareness. Let’s recap the cornerstone principles for a successful journey:
- Size Intelligently: Measure your natural waist and size down moderately (3-4 inches for beginners). This is the non-negotiable first step for safety.
- Prioritize Fit and Comfort: A well-fitting garment supports without causing pain. Address issues like back bulge with better style choices and proper layering.
- Set Realistic Goals: Understand that a waist trainer is a tool for temporary shaping and posture, not a magic solution for permanent weight loss.
- Wear It Correctly: Follow the break-in period, always wear a protective layer, style it with your bra underneath, and listen to your body’s signals.
- Invest in Quality: A well-constructed waist trainer from a reputable brand is safer, more durable, and ultimately more effective than a poorly made alternative.
As summarized by health experts at Texas A&M Health, informed and cautious use is paramount. Waist training is a commitment to a practice, not a race to the smallest measurement.
Ready to begin? Your first and most important step is taking those accurate measurements. If you’re unsure about the difference between waist trainer styles for your goals, explore our guide on choosing the right shapewear to make the most informed decision for your body and needs. Remember, the most effective waist training journey is one that is comfortable, consistent, and safe.